
How to Edit Continuous Training Campaigns
The article explains how to edit continuous training campaigns by navigating to the unified Campaigns page, where users can change the campaign's name and description, select the audience, review the curriculum, and set the schedule, with detailed steps starting from accessing the Training Dashboard.
How to Edit Continuous Training Campaigns
You created the continuous campaign but want to change some settings. Let's see how.
IMPORTANT NOTE - 8.12.2025
Creating, viewing, and editing all campaign types has moved to a single, unified Campaigns page, which can be accessed under 'Campaigns' from the side navigation. This article and others may not accurately represent the location of campaign tools.
So you just finished setting up your continuous training campaign through the Continuous Campaign Creator tool, and now you're looking to configure and adjust the perimeters to that campaign. This is the article for you.
In this article, we will be discussing the following...
- How to change the campaigns name and description
- How to select an audience
- How to review the curriculum
- How to set the schedule
Let's dive in!
Step 1: Navigating to the Training Dashboard
Tourial
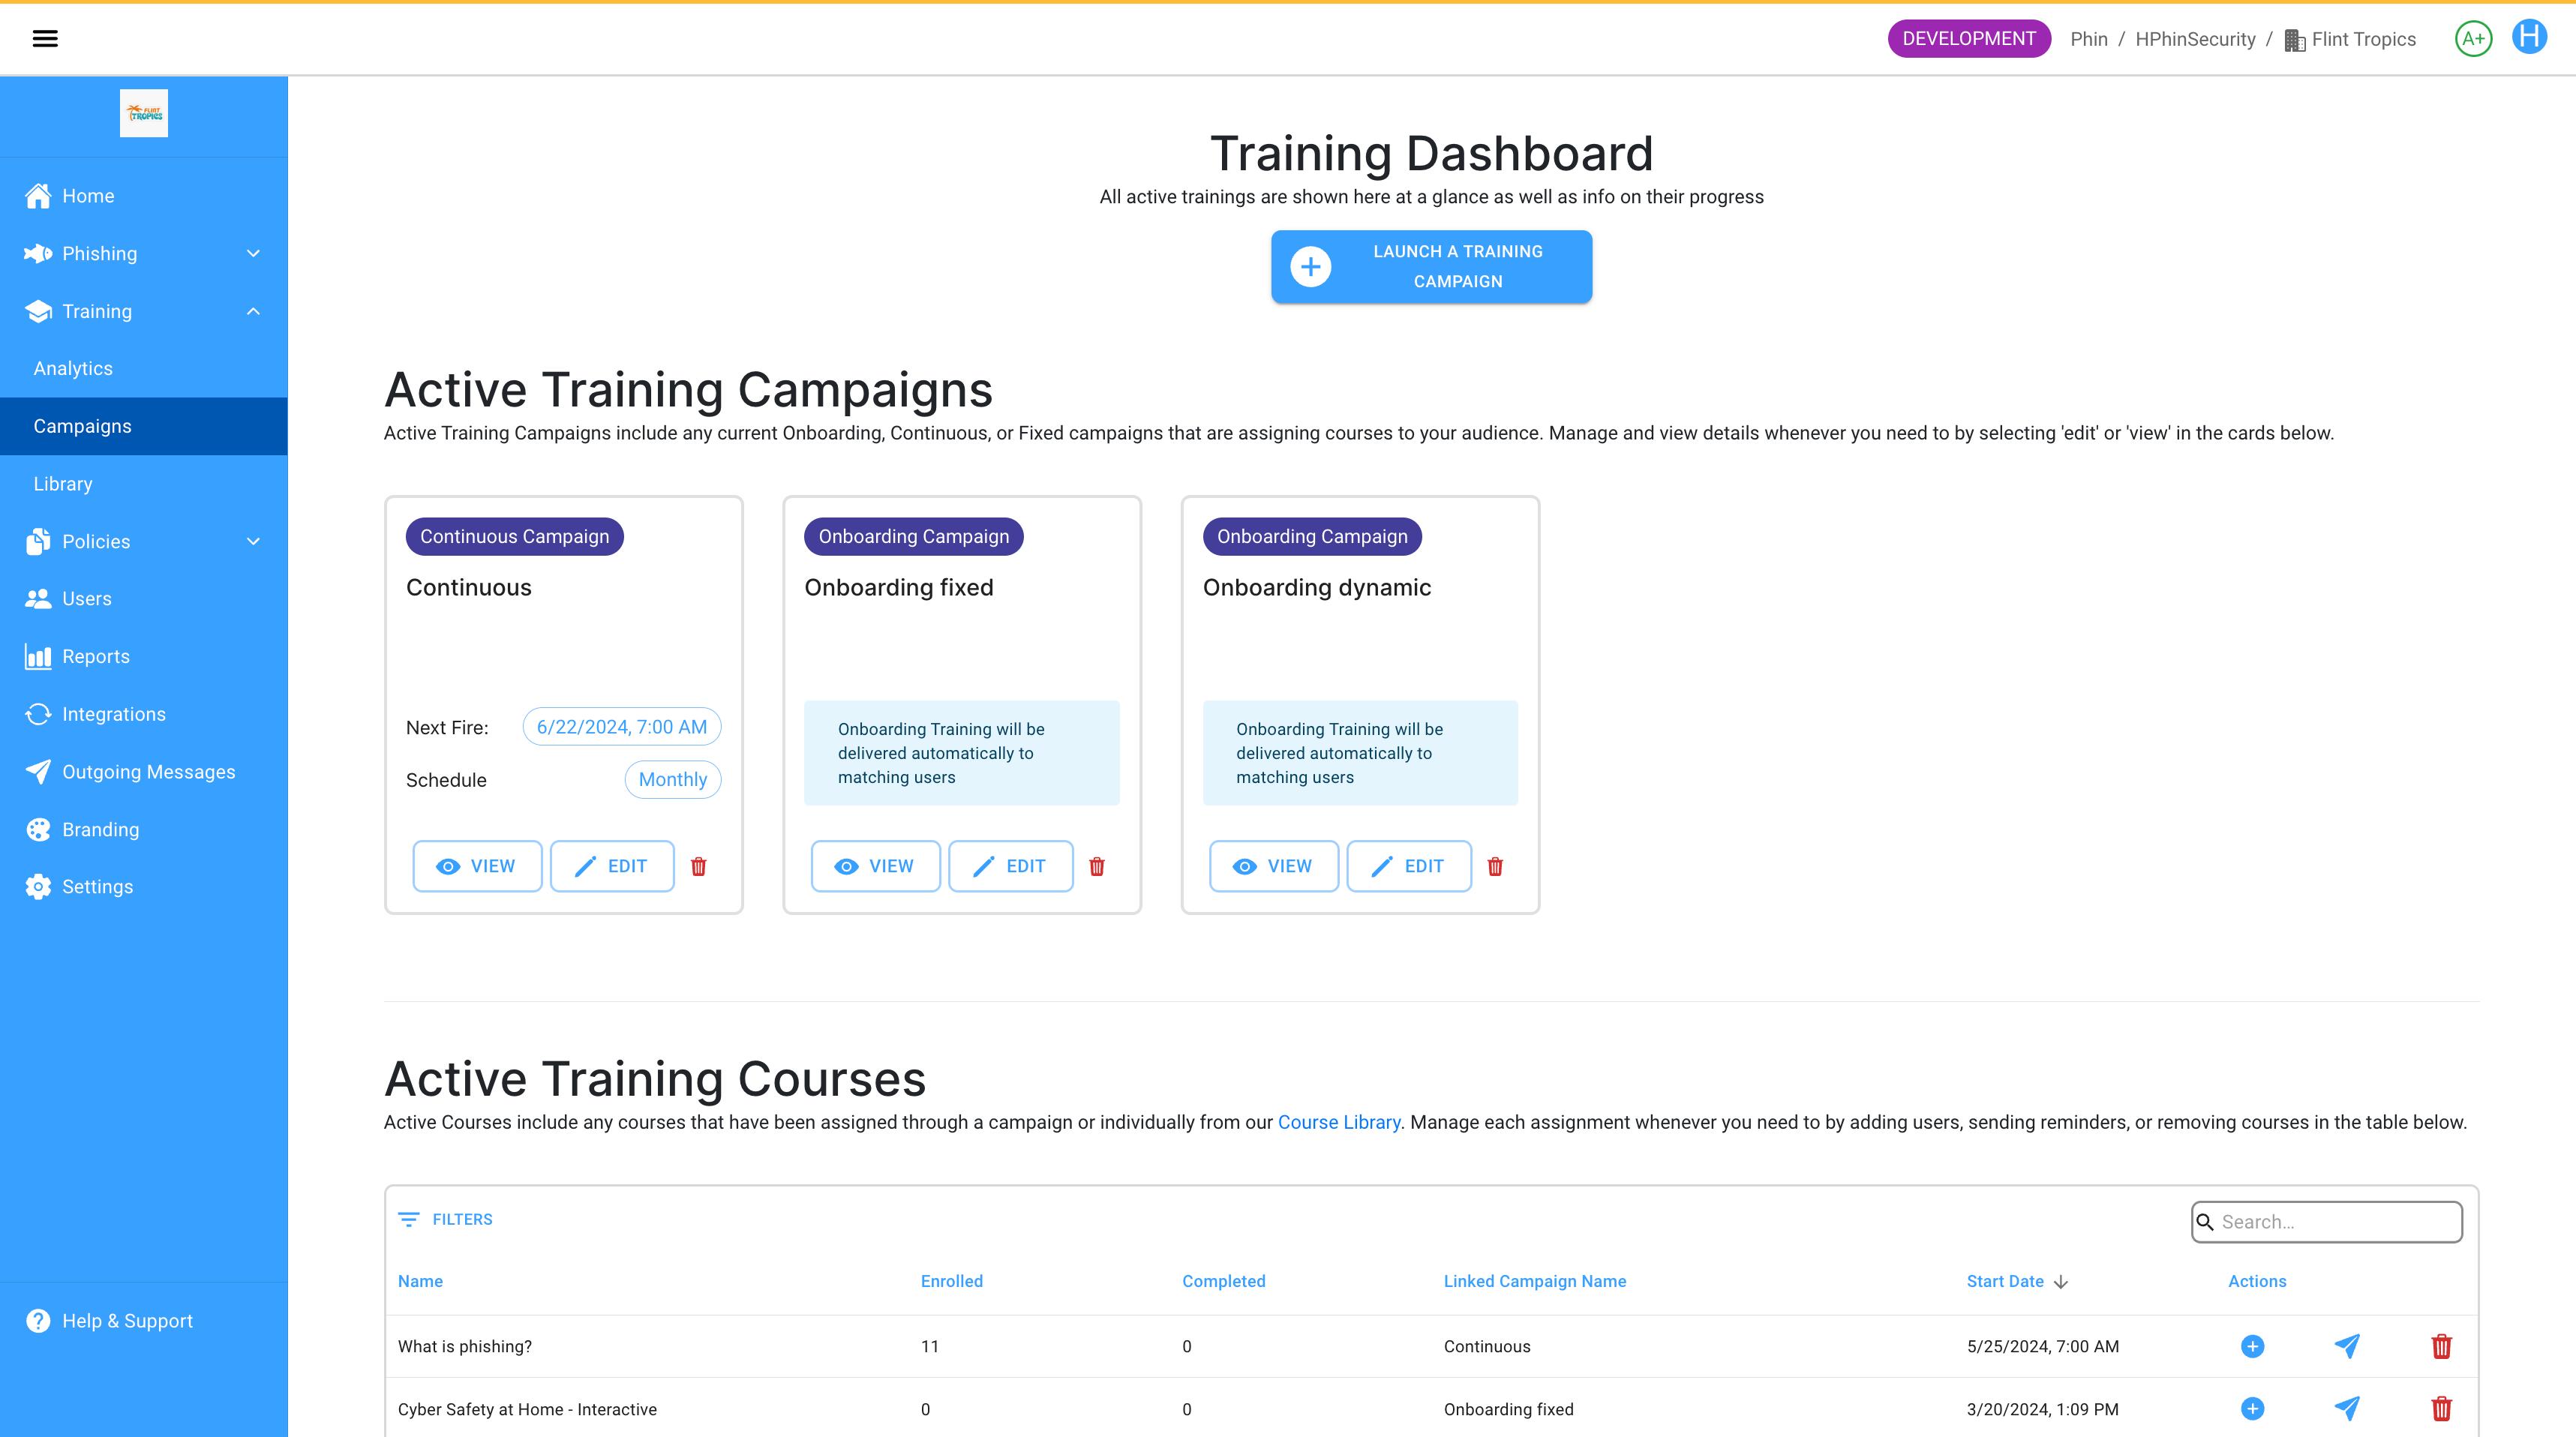
Select Training from the menu and then Campaigns.

reCAPTCHA
Recaptcha requires verification.
protected by reCAPTCHA
- 1.If you aren't already at the home screen of the client portal, start by navigating to the home screen. Once here, we need to get into the Training Dashboard.
- 2.Start by clicking on Training in the left side hand menu.
- 3.Once the drop-down menu appears, click on Campaigns.
- 4.Now that you're in the Training Dashboard, you will see any campaigns you've created listed under Active Training Campaigns.
- 5.To begin configuring the campaign settings, hover over the campaign you'd like to edit to bring up campaign management options.
- 6.Let's go ahead and click the Edit button we just looked at (the blue pencil) to enter into the Training Campaign Editor.
Step 2: How to Change the Name & Description
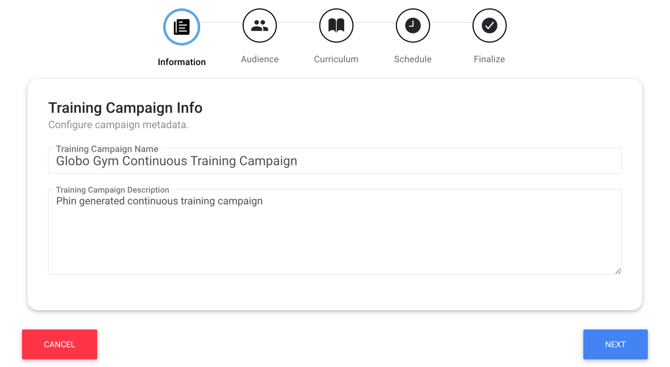
- 1.After clicking the Edit button, you will see the screen below.
- 2.The first page will allow you to change the Campaign Name and Description.
- 3.Once you've set the campaign name and description to your liking, click Next.
Step 3: How to Select an Audience
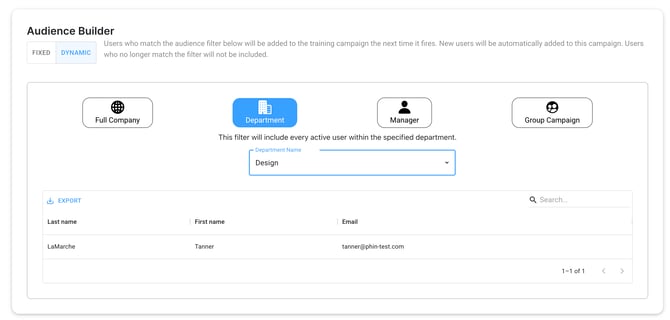 You have four options for delivering campaigns.
- 1.
Fixed Audience The fixed audience option will deliver this campaign to a fixed set of users within the company. Everyone that is currently active will be available to select to add to this campaign. Start by filtering, using Select All, and/or selecting individual users. The audience will appear on the right side of your screen under Selected Users. To learn more about fixed audiences, click here.
- 2.
Dynamic Audience - Full Company
The full company dynamic audience option will deliver this campaign company-wide. So everyone currently on the platform and any future new users will be added to this campaign.
- 1.Dynamic Audience - Department
The department dynamic audience option allows you to deliver this campaign to a specific department within the company. Start by selecting a department in the dropdown to see the current user groups.
If you don't know how to add departments to your users, click here.
- 1.Dynamic Audience - Manager
The manager campaign option allows you to deliver this campaign to a specific manager within the company. Start by selecting a manager in the dropdown to see the current user groups.
If you don't know how to add a manager's email to your users, click here.
Now that you've selected the audience that you'd like to receive this campaign click Next.
Step 4: Reviewing Curriculum
The next page will show you the curriculum available for this campaign.
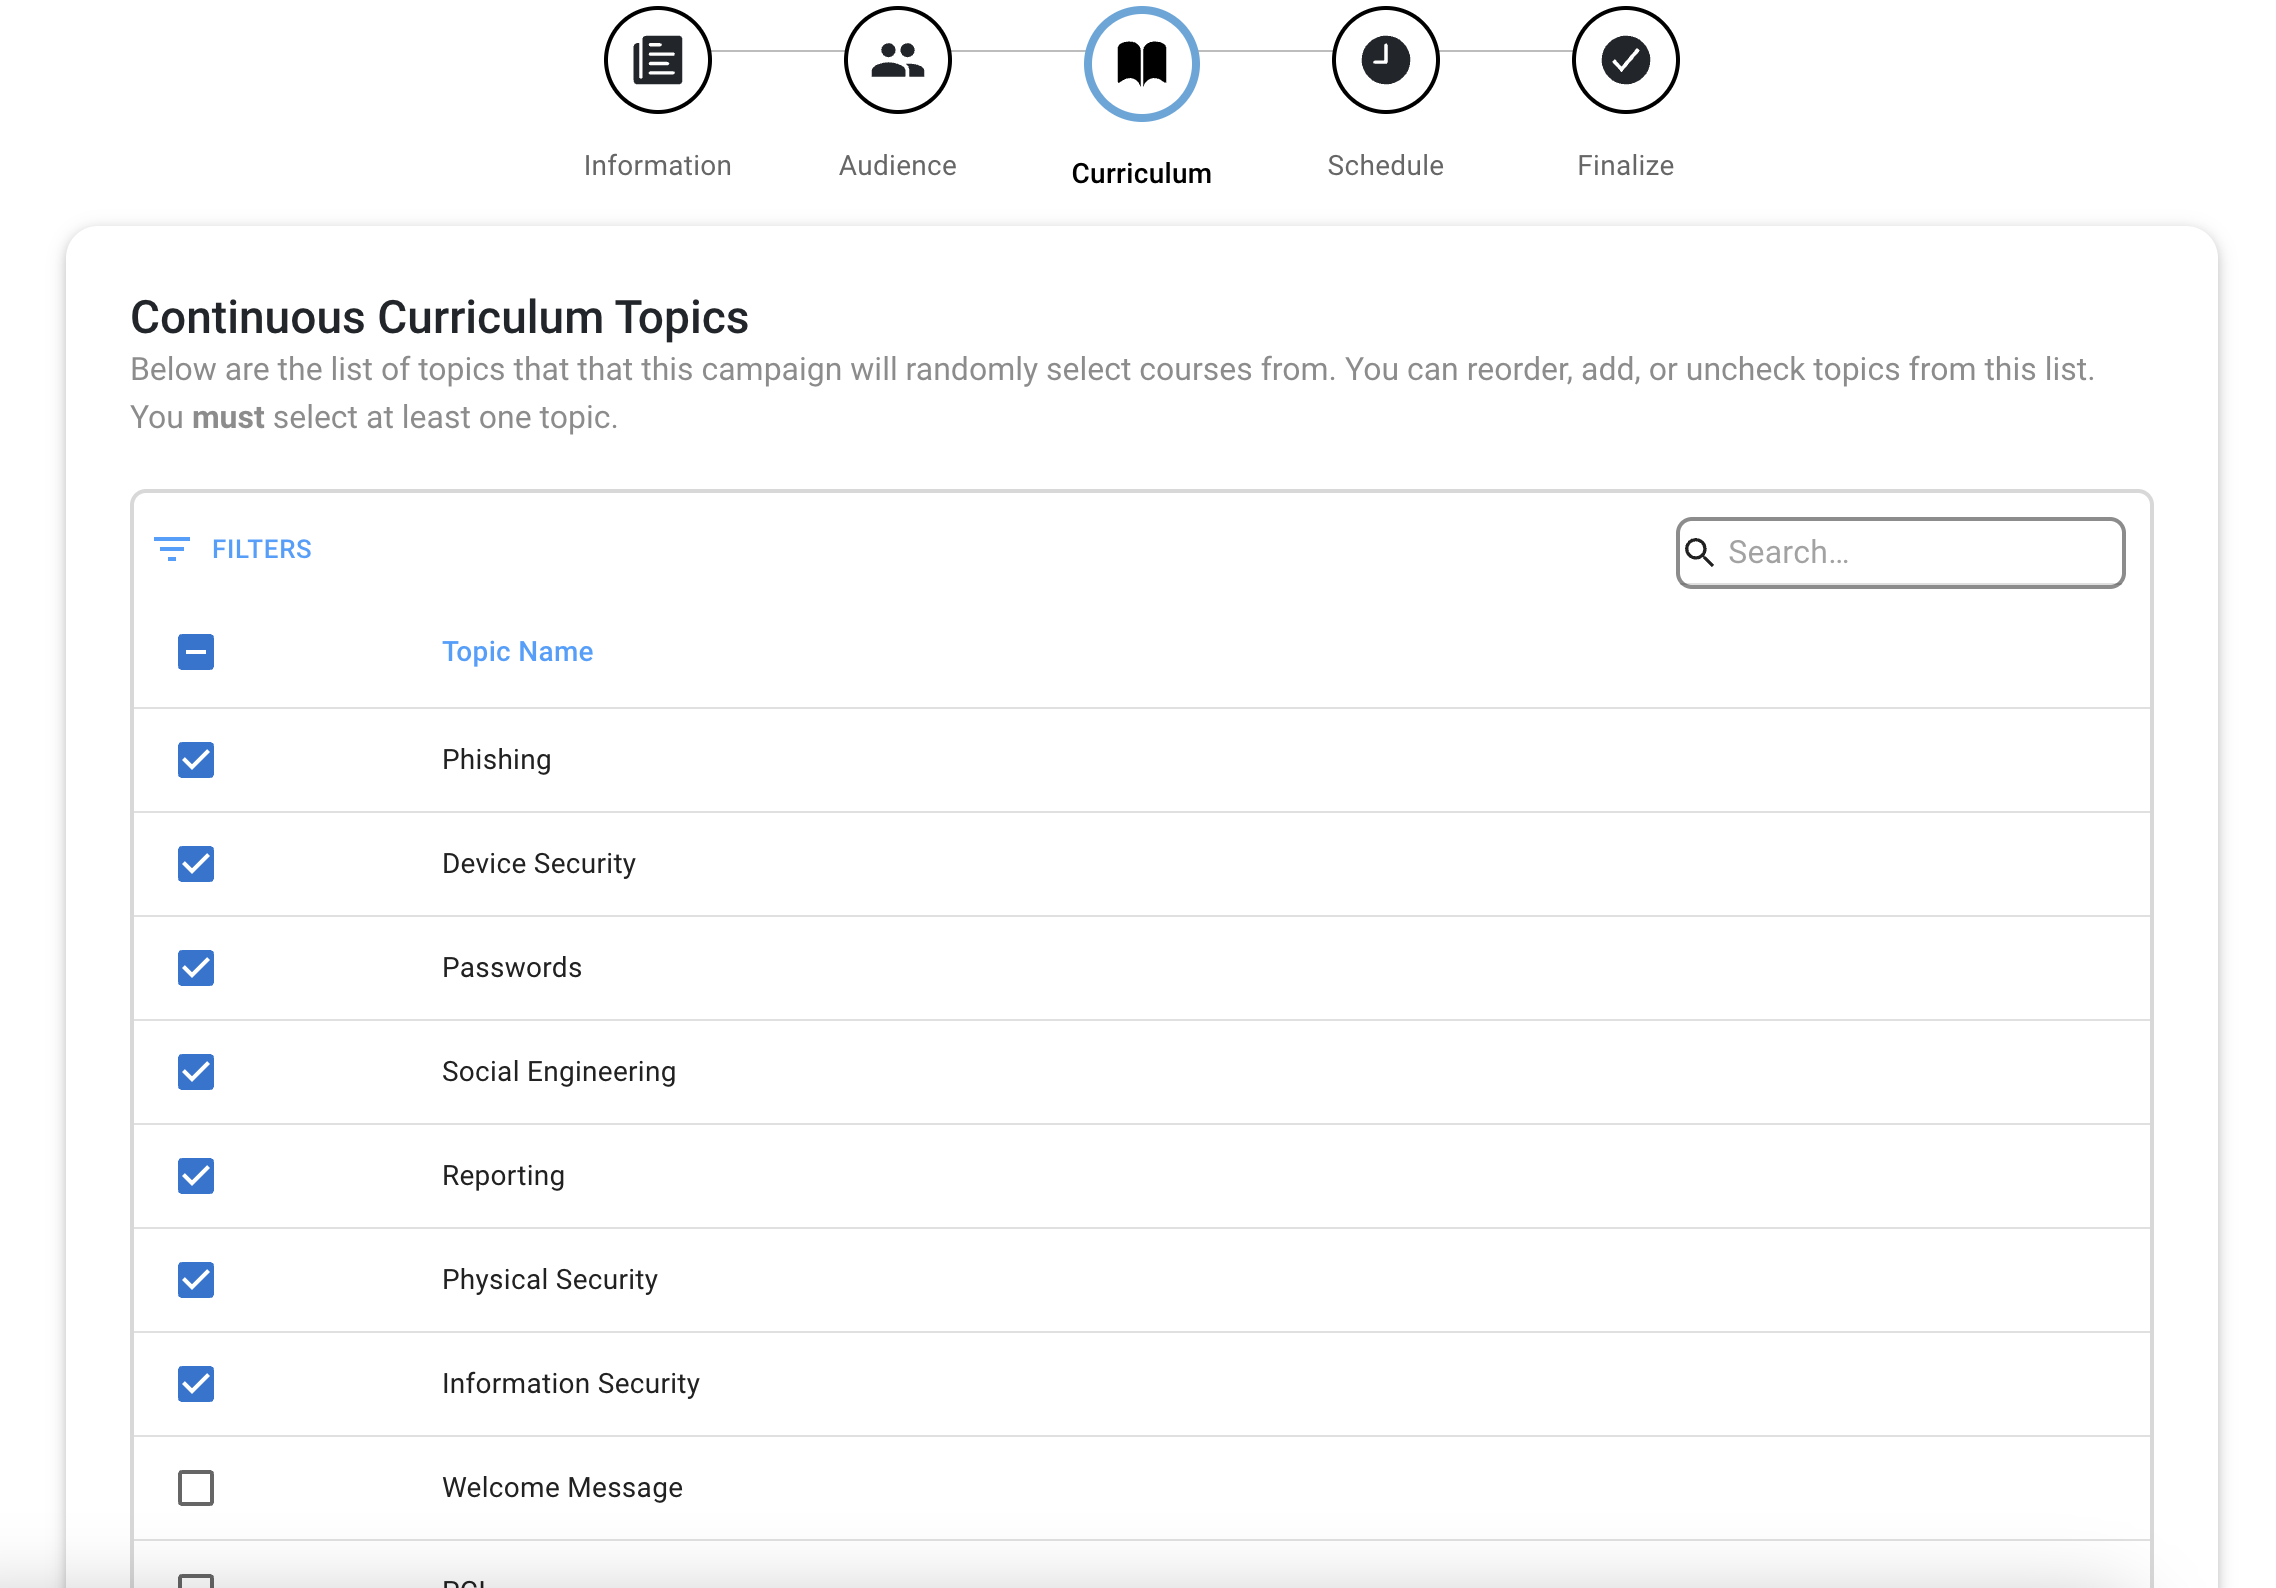
After you're done reviewing the curriculum, click Next.
Step 5: Setting the Schedule
Setting a schedule is easy with our scheduling tool. First, we can talk about how the tool works in conjunction with the Continuous Campaign Creator tool.
When you set your Start Date with the Continuous Campaign Creator tool, that is not when the campaign will first deliver. The Start Date is when the campaign will begin to look for the sending perimeter set for the campaign.
What is the sending perimeter, and how do you set it? Great question! Let's go ahead and dive in on how to set the schedule.
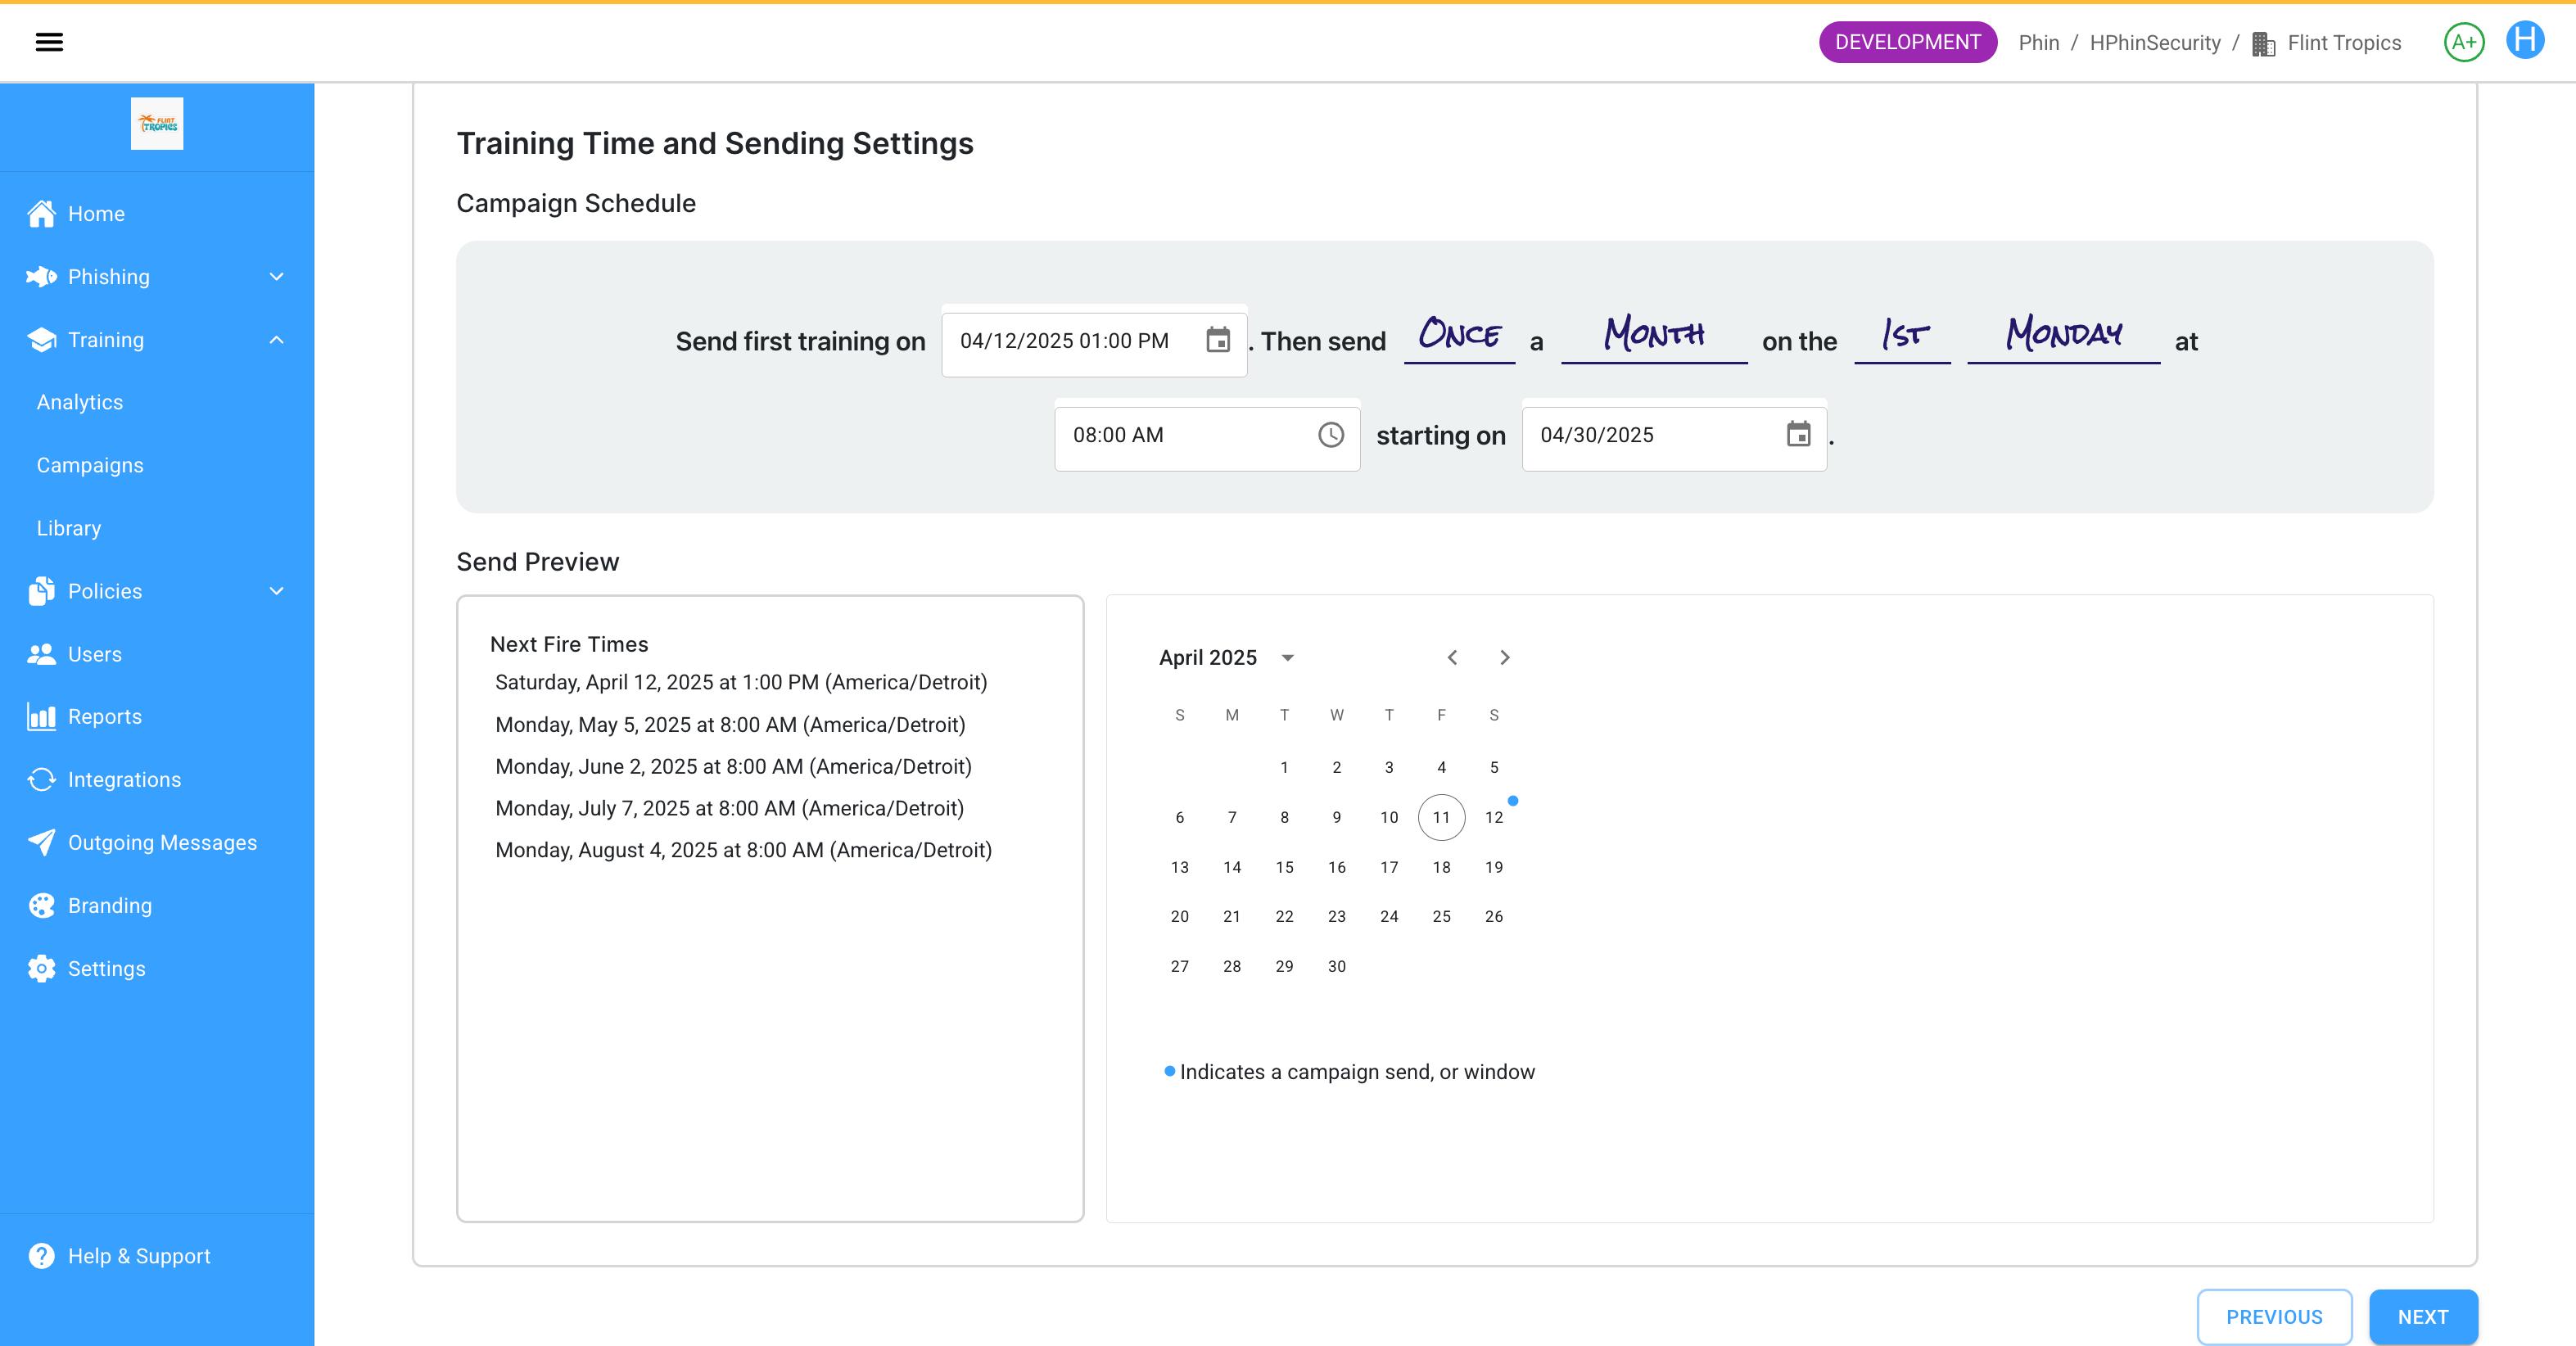
Admins can update the course scheduler at any point during the campaign. The soonest a campaign can be scheduled to send is 24 hours in advance. This is done by adjusting the start date seen below.
Important note: All parameters for campaigns created with the Continuous Campaign Creator tool are preset to Monthly on the 1st Monday of the Month.
You can change your parameter with our scheduling tool shown below.
Tourial
Start

reCAPTCHA
Recaptcha requires verification.
protected by reCAPTCHA
To restart the video, Click Tourial and then Restart Tour.
You have five options to adjust the campaign schedule.
- 1.Frequency of sending
By clicking on "Once," you will see a dropdown menu that will allow you to change the frequency of the campaign. 2. Changing the frequency of delivery
The second option will allow you to select Weekly, Monthly, or Quarterly. 3. Changing the week of delivery within the campaign
The third option will allow you to adjust what week you'd like the campaign to deliver in any given month or time period. 4. Changing the delivery day of the week
The fourth option will allow you to adjust what day of the week you'd like your campaigns to deliver on. 5. Changing the time of the delivery
The fifth option will allow you to change the time at which the phishing campaign begins to fire.
Continuous Training Campaigns are sent out all at once at the time selected.
Example
Recurring schedules allow you to designate a specific date and time for the first training, followed by a recurring schedule, also determined by you. Let's walk through an example:
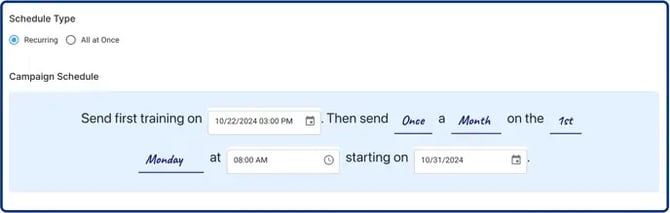
In the schedule example above, I want the first course in my training campaign to be delivered on 10/22/2024 at 3 PM (time-zone specific). Scheduled courses after this date will reoccur once a month on the 1st Monday at 8 AM, starting on 10/31/2024. Below our scheduler, we can see a preview of our schedule in both a list view and a calendar preview.
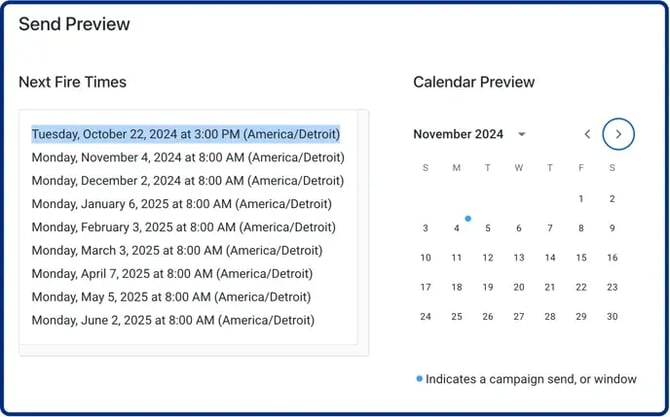
When you set the last field of the scheduler, that is not the date of when the recurring campaign will deliver its next course. Instead, it is when the campaign will begin to look for the sending parameter set for the campaign. In the example above, the sending parameter is "once a month on the 1st Monday at 8 AM, starting on 10/31/2024." This means that starting on 10/31/2024, the scheduler will find the next date that equals the 1st Monday of the month, which is 11/4/2024.
Any changes you make will be reflected in your Campaign Details pages.
Once you've set your schedule, the final thing you need to do is click Launch.
Viewing the campaign details
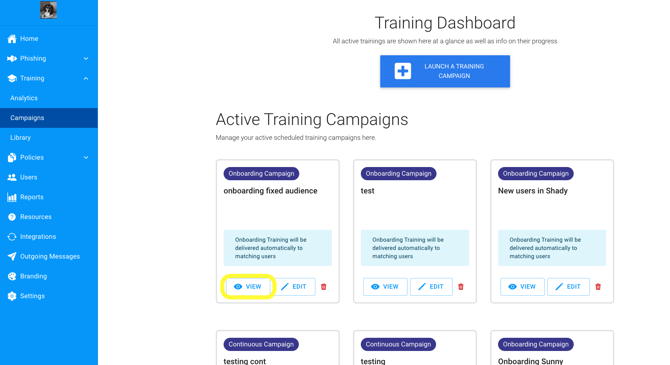
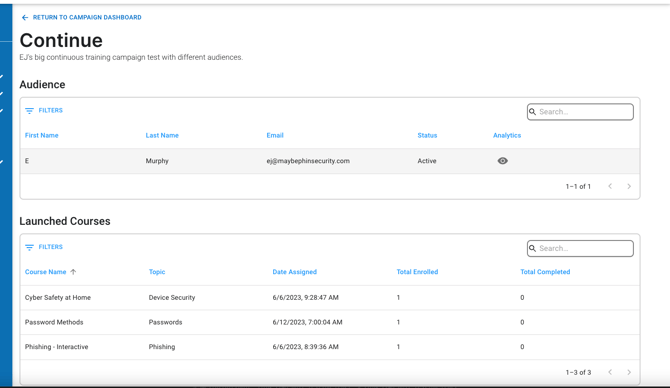
We now also have the ability to view the details of the campaign on a separate page if we click on the eye icon on our campaign card. To learn more about campaign details click here.
Cancel Campaign
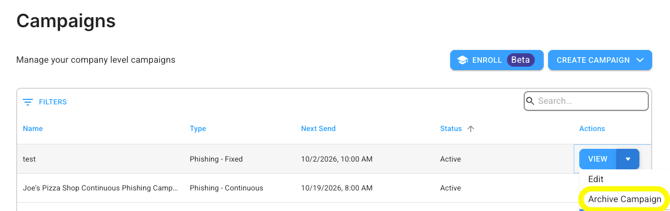
Company-level campaigns will need to be archived first before they can be fully deleted. That can be done from the 'Campaigns' menu at the company level and by clicking the drop down next to the 'View' icon.
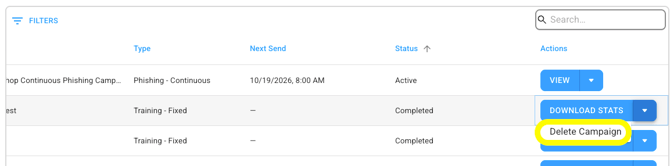
Once the campaign is archived, you can delete it:
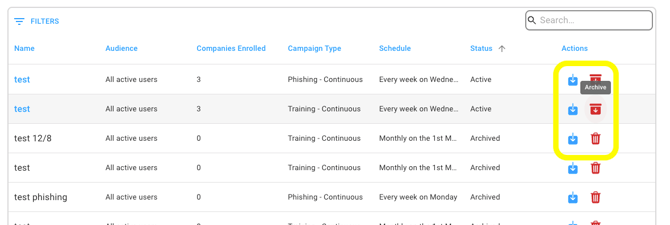
The same rules apply at the shared campaigns level:
Was this article helpful?
YesNo